
My little lady is turning 5 (tear) and she has been talking about having a Frozen birthday party for months. I have no idea where she gets her need for planning every detail of a party months in advance -wink, wink. So we thought since she is turning 5 and that is sort of a big deal, we would give in and do a Frozen party right and even invite Elsa to the party. She is so excited (and I’ll admit, I am too.)
This will be her first big girl birthday party where a few of her friends are dropped off for an afternoon with Queen Elsa and I am excited to finally have a party that really is all about my sweet little girl. Not just mom and dad’s friends over for a BBQ.
You are watching: Free Printable Frozen Birthday Party Invitations

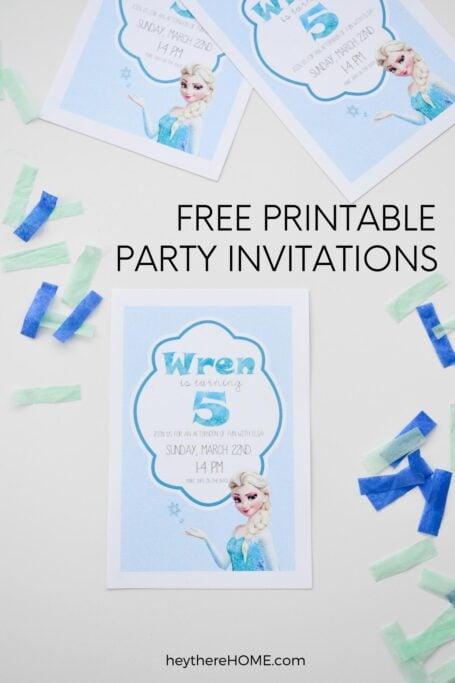
We had to get party invitations delivered to her friends and so this crafty mom whipped some up! And of course part of my taking the time to do so was so that I could share these free printable Frozen birthday party invitations with you! I love how they turned out and I’ll walk you through the steps to customize them with your party details.
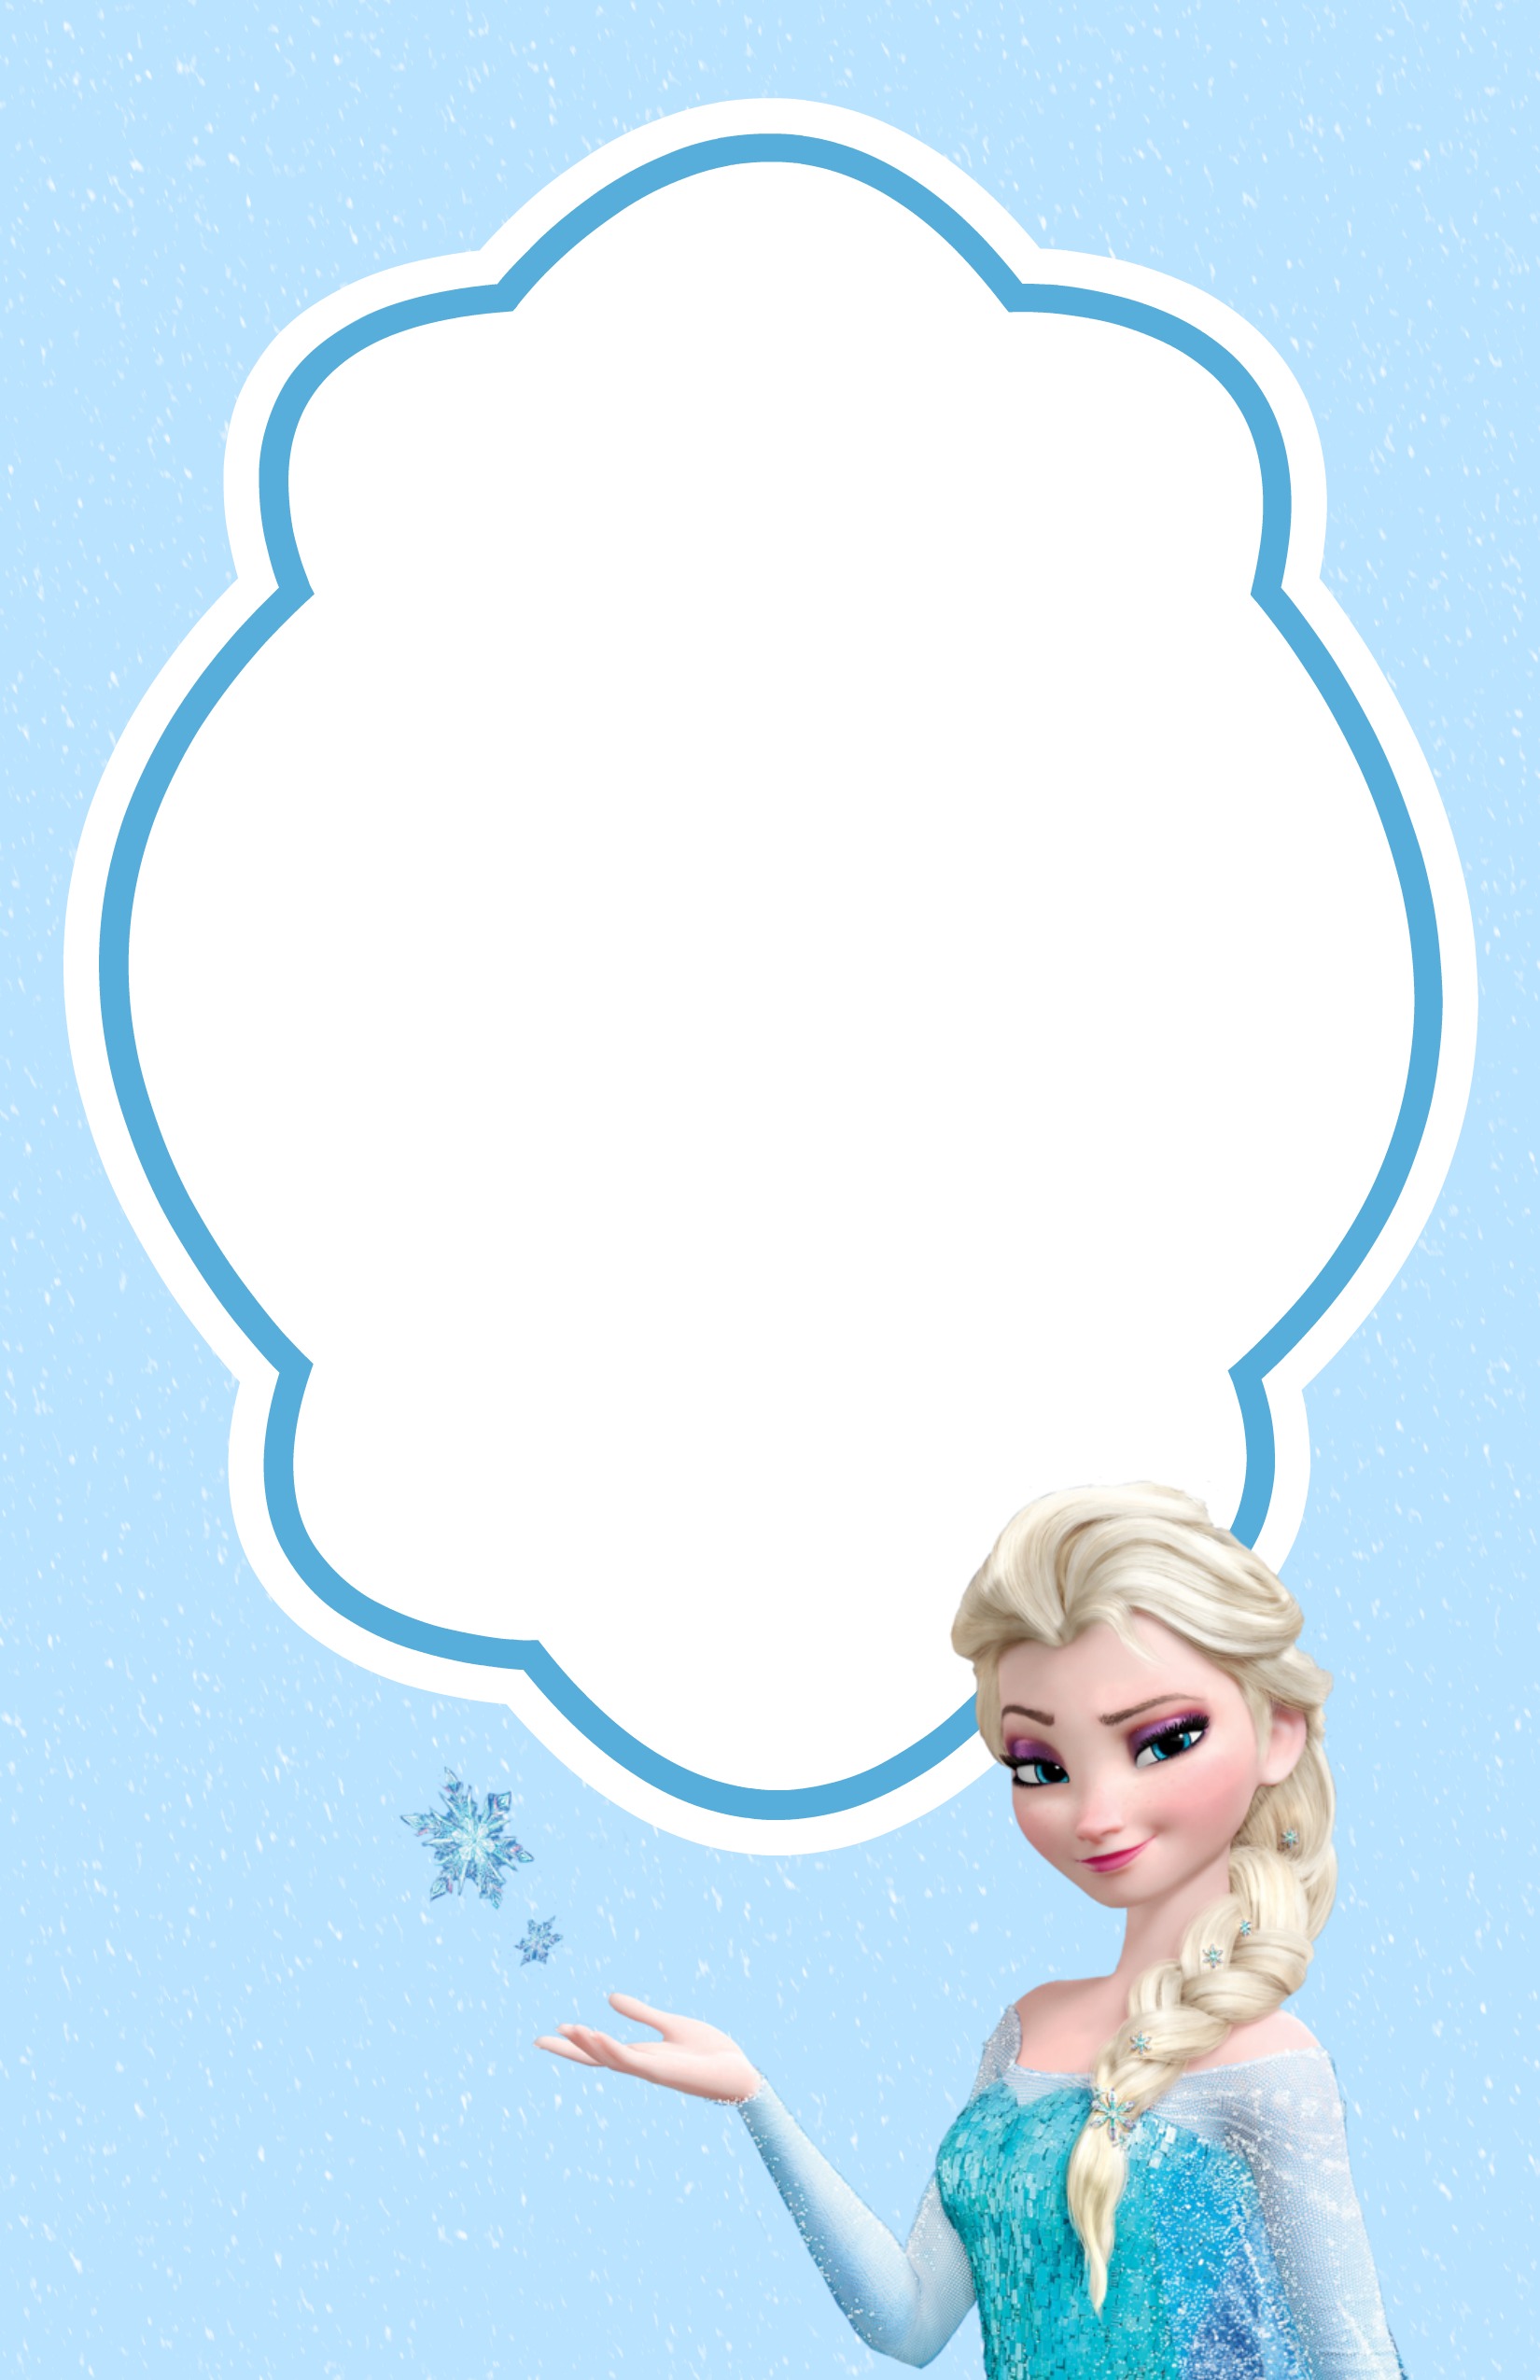
These invitations are two sided, but if you want to include all of the party information on the front side you will only have to print one side. I had some special info to include, so I put it on the back side. They will print two to a page so you will have to cut them and then they will fit into a 5.75 x 8.75 envelope.
How to customize birthday invitations
Step 1: Download the template
Download the invitation template here and save it to your computer. (Also download and save the back side here if you plan to use both sides.)
Step 2: Open Canva
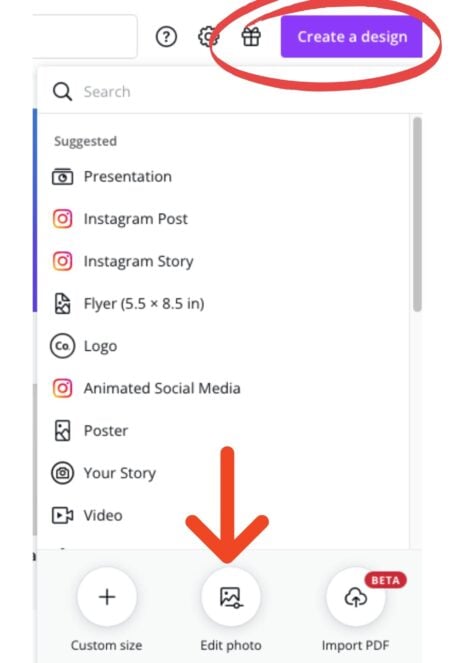
Go to www.canva.com and click “Create a Design”. Select “edit photo” from the menu and then select the (front) frozen invitation template that you just downloaded.

Canva is a photo editing tool that I use all the time to make quick edits to photos and add text to pictures. There is a free version which is great with lots of font options. There is also a paid version for users who need frequent and professional graphic designing with robust font and design capabilities.
Step 3: Add text
Read more : Most Recent Dollar General Penny List (Full List)
Now you are ready to add text, so click the “T” icon on the left.
Step 4: Add heading
A text box will appear. Select “Add a Heading.” Type your text.
Use the tool bar that opens at the top to choose your font type, color, font size, and format (bold, underline, italics).

A few things to point out in case this is your first time using Canva.
- Change the location of the text by dragging it into place.
- Change the size of the text by dragging the corners of the text box in and out.
- You can have different size text from one line to the next by starting a new text box for each (just click “T” from the menu for each new text box.)
- Change fonts by clicking the down arrow next to the font name on the tool bar. A huge selection of font names will open for you to choose from.
- The little crown next to some fonts is the royal feature, which means that if you want to use it you will have to become a paid Canva user, but it is really inexpensive.
Step 5: Save and download
Your work saves in Canva automatically.
Once you are done, save your invitation back to your computer by clicking “download” at the top right. If you want to keep the template on your computer you will need to name this finished invite something different.
Step 6: Side two (optional)
If you are making a two sided invitation, go back to Canva’s homepage by clicking HOME in the upper left corner. Click “create a design” and “edit photo” again, but this time select the back side of the invitation. Follow steps 3-5 above to add text and save it to your computer.
Printing your invitations
Read more : Stamping Boxes: How to Stamp Boxes | Video and Instructions
I highly recommend going to a copy shop to print out your invites because the quality of their color printers makes these look really good.
If you do go to a copy shop, you will want to call them ahead of time and get the email address that you will send to so that they have the file when you get there. (You can also email it to yourself and then just forward it to them when you get there.)
They will try talking you into resizing the image for an absurd 8 dollar fee, but it isn’t necessary.
Just have them open the image and select the option to print two to a page (I had them printed on cardstock.) You will be able to see that it fits great in the preview.
Once they have printed two to a page, have them put the same papers back into the load tray and have them print the back side the same way (two to a page.) Be sure that it is loaded so that they print with the text going in the right direction. They will do a test one for you, just ask.
Now you’re all set to cut them and put them into 5.75 x 8.75 envelopes! (Which I found at FedEx Office, the same place I had these printed.)
Ok, I’m off to plan some more party details! Have a great day!
Source: https://antiquewolrd.com
Categories: Stamps