
If you’re following along on our January DateBox, you’ll see one of our goals is to learn a fun parlor trick together. We chose learning to fold a dollar bill into a ring – because it is JUST REALLY COOL to have a trick like this up your sleeve and to make rings for each other 🙂 Every niece, nephew, kid and friend will want you to teach them. We’re reposting this video & these instructions that we found so easy to follow.
Video: Dollar Bill Ring Step by Step
Special thanks to Rob’s World on YouTube for the excellent video
You are watching: How to Fold a Dollar Bill Ring
Photo Instructions

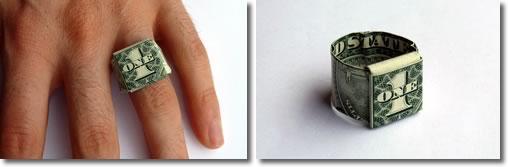
The dollar bill ring design we’ll show you on this page works best with $1 or $10 bills of US currency, but with a bit of adaptation you can also make it work with other size bills or money from other countries. Here’s what the finished ring looks like:
Photos: Dollar Bill Ring Step by Step
Step 1
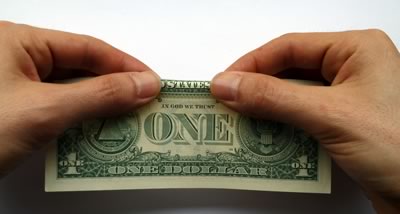
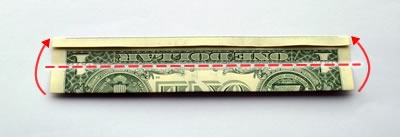
Start with the bill this way up. Fold back the top white edge, right where it joins the green part of the bill.

Step 2
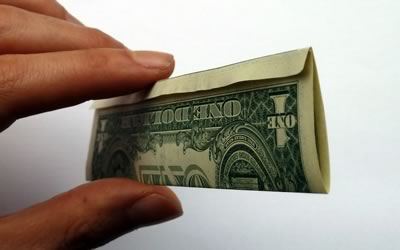
Turn the bill over. Fold the bottom edge up to meet the top, and tuck it under the little flap.

Here’s a side view so you can see what I mean about tucking under the little flap:
Step 3
Fold in half again. (But don’t tuck under the flap this time.)
Step 4
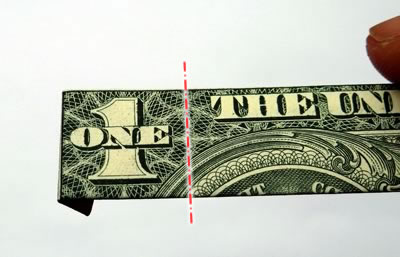
Turn the bill over so that it’s this way up, with “The United States of America” along the top. Then fold back the white edge to the left of the “1″, just at the point where it joins the green part of the bill.

Read more : Top 15 trang web bán hàng online nổi tiếng thế giới
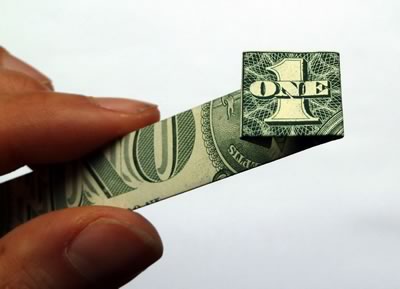
Next, fold back the bill on the right of the “1”, so that the “1″ looks like it’s in a square box:
Your bill should now look like this, with a “1 square” on top.
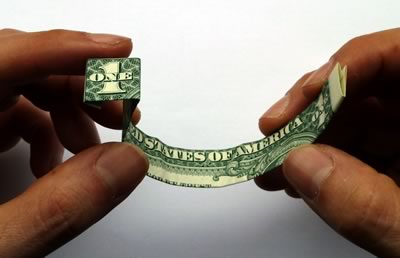
Step 5
Bend the bill so that it looks something like this:
Step 6
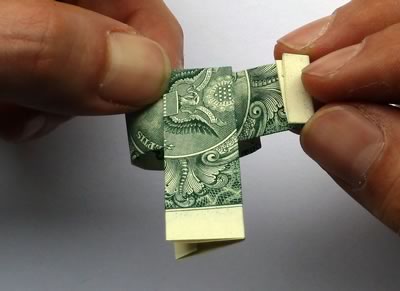
Fold up the right hand part of the bill like in the photo below. Make it so that the left edge of the bit you fold up goes right between the “O” and the “F” of the word “OF” in the “THE UNITED STATES OF AMERICA”.
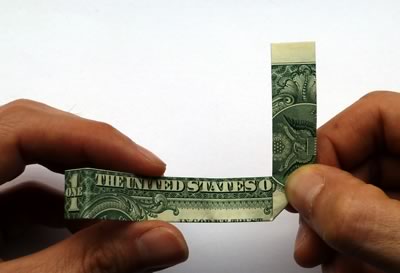
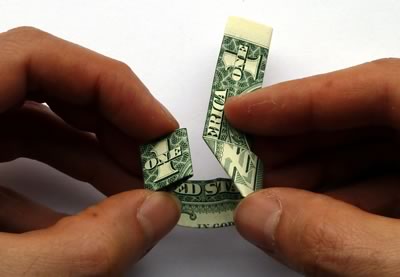
Step 7
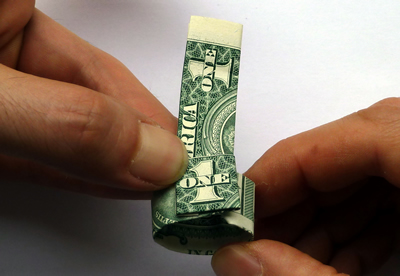
Curve the bill around like this…
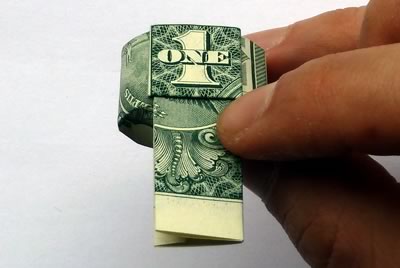
…and keep going until the bill looks like the picture below. See how the “1 square” is lined up on top of the vertical poking up bit underneath?
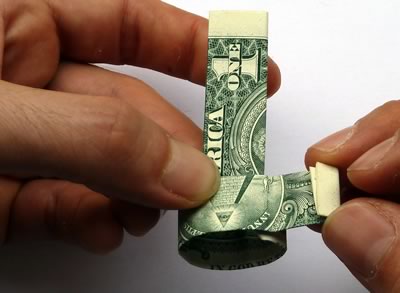
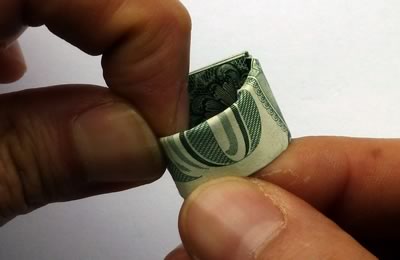
Step 8
Open out the “1 square” to the right, like this:
Then fold down the vertical bit like this:
Finally, fold back the “1 square” back on top, and tuck the little flap under the vertical bit you just folded down a moment ago:
Step 9
Turn the ring over so it looks like this. Then fold the poking up bit down and through the center of the ring.
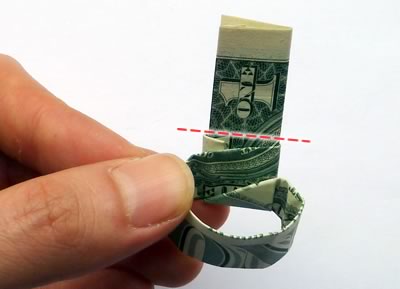
Once you’ve made the fold, it should look like this:
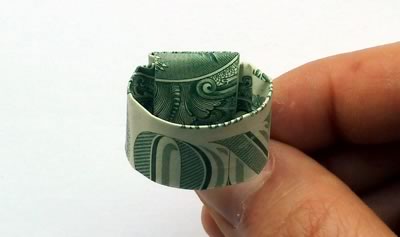
Step 10
Turn the ring over again so that you’re looking at it from this angle:

Fold down the little flap, and tuck it under the “1 square”. It’s a bit fiddly, and it helps to use your fingernails or a pencil:
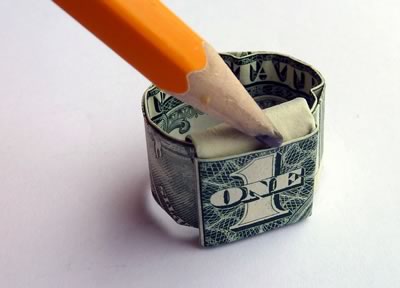 Your ring is nearly finished…
Step 11 (optional)
We like to fold over the edge of the ring’s band, to make it a little narrower, which we think looks more stylish.
If you choose to do this, here’s what your ring will look like from the side:
 See how it’s narrower at the back than at the front? We think it looks cooler this way, but you might prefer it chunkier like it was before – it’s up to you!
Finished!
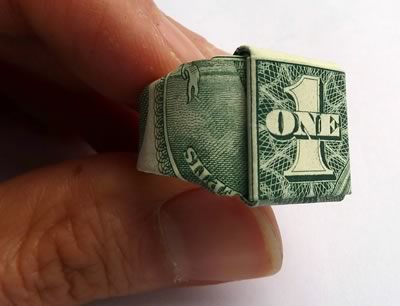
Here’s what the finished dollar bill ring looks like:
And here’s what it looks like when you wear it:
Special Thanks to Home Made Gifts Made Easy, check them out for more dollar bill origami & other creative posts.
Source: https://antiquewolrd.com
Categories: Stamps